



HIGHLIGHTS
- In Chirping Secret Treasure mission, you must solve puzzles with moving balls, switches to unlock doors and reach secret treasure rooms.
- After finishing each puzzle and collecting rewards, you need to talk to Joyworm to continue the adventure and unlock the next challenge.
- In the end, you’ll open several chests and earn rewards like Scholar’s gear, Stellar Jade, the Poet’s Drill Wreath, Celestial Ambrosia, and more, with insect companions returning as the final touch.
Chirping Secret Treasure is a fun puzzle mission you can do in Dragonbone City, Stixia. It only shows up after you finish the main story called Three Blades.
In this quest, you’ll solve different puzzles using moving balls, switches, and elevators. Each puzzle helps you open new doors and find secret treasure rooms.
You’ll also talk to a character named Joyworm to keep going in the mission.
Solve The First Puzzle For Chirping Secret Treasure
After talking to the caster, teleport to the marked spot. Do not enter the door right away. Instead, go left.
You will see a ball that moves by itself and hits an enemy. After that, interact with the Joyworm Chirping Secret Treasure. Then ascend to reach the next level.
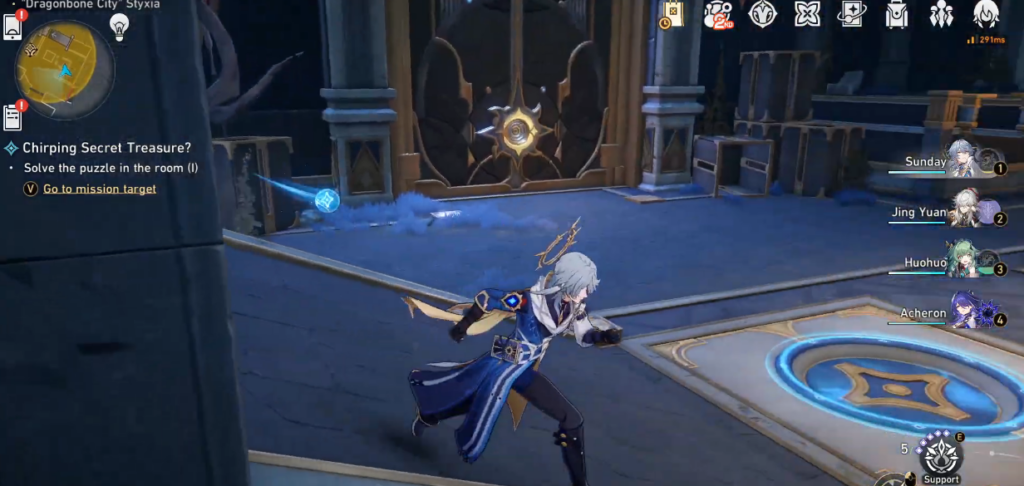
Inside the room, you must solve a puzzle to open the door. First, break the ball to make it fall and roll.
Use a ranger character to activate the switch. Then, interact with the ball to reverse time. After freezing the ball, it will stop at the right spot, and the door will open.
Go inside, and you will find three chests:
- Two basic treasures
- One bountiful treasure
From the bountiful treasure, you will be rewarded with a Scholar’s Tweed Jacket, 20x Stellar Jade, 1x Traveler’s Guide, 1x Scholar’s Tweed, 3x Lost Gold Fragment, 1x Scholar’s Silver, 1x Scholar’s Felt, 30x Celestial Ambrosia, and 300 Credits.
Talk To Joyworm And Continue To The Second Puzzle
After collecting the chests, speak with Joyworm to continue. Go to the next mission target. You’ll find a new room with more puzzles.
Go upstairs and fix the left side puzzle. Place one object in each corner. Then take the elevator up.
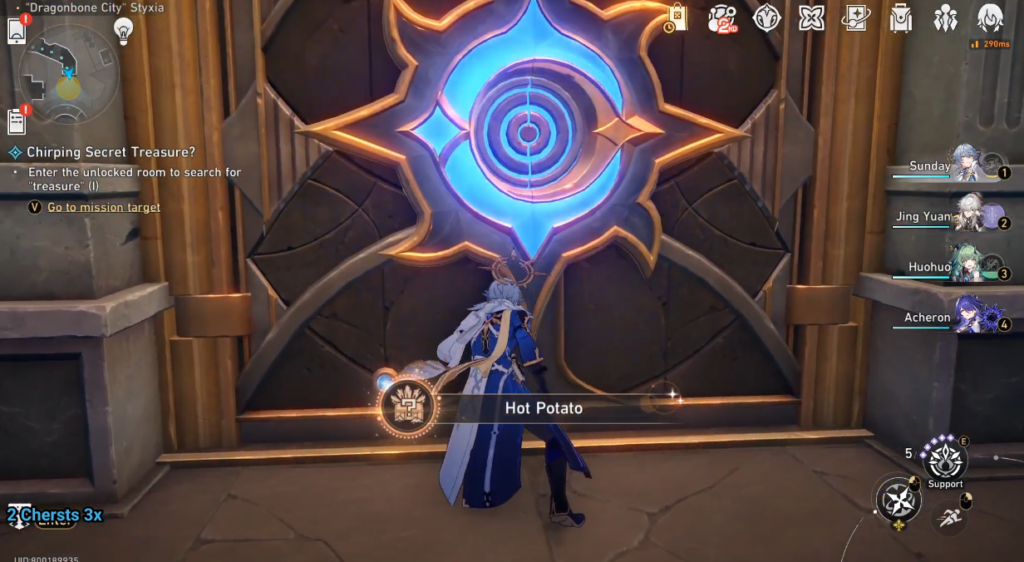
Break the next ball to make it fall and rotate down. Repair the bridge and go down. Break the middle block, then reverse time. The ball will stop in the right place and the door will open.
Inside, you’ll find three more chests:
- Two Basic Treasures
- One Precious Treasure
From the precious treasure, you will get the Poet’s Drill Wreath.
Final Puzzle In Dragonbone City For Chirping Secret Treasure
Talk to Joyworm again to continue. Teleport to the next area in Dragonbone City. Go inside and head up using the elevator.
Repair the bridge and drop the ball to break the box. Then, repair the bridge again to go back up.
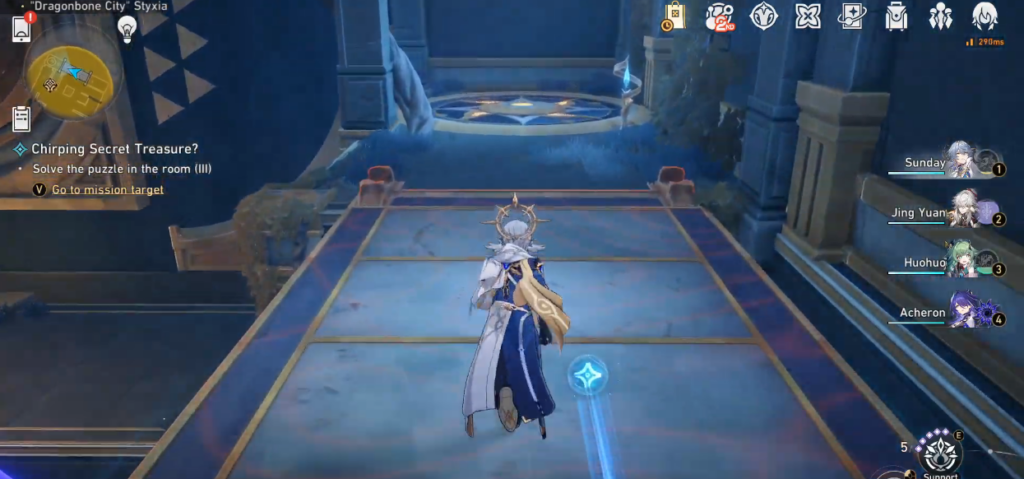
Break the last block. Then, activate the switch and reverse the ball in front of you. Pick up the power-up so you can reverse it further.
Make the ball stop at the right spot. Go back and freeze it again so it stays. Once it’s in the perfect position, the door will open.
Inside, you will find the last three chests:
- One basic
- One bountiful
- One Precious Treasure
You will also get another Poet’s Drill Wreath. At the end, insect companions return. That’s the end of the quest.
There’s also a secret hiding room connected to the Name of Nymphs puzzle but that’s for a different mission.

